Thursday, June 28, 2012

Yo Gabba Gabba Cake


I was asked to do a cake with Foofa from Yo Gabba Gabba for a little girl's 3rd birthday.  I was excited to design a cute cake, and my kids were equally excited when they saw the Foofa that I created for the first time.

Instead of a standard half sheet cake, we went with a 12 inch round cake which feeds approximately the same amount of people.  One layer was yellow, the other was chocolate.  It was covered in my French buttercream.  At first I considered making Foofa out of fondant alone, but that is a bit risky.  Sure, she wasn't going to be super huge, but the party was in a park.  We have been having some very hot weather here in Pittsburgh, I wasn't sure she would hold up!  I could have made her entirely out of gumpaste, but who wants to eat a gumpaste character?  So, the night I was going to craft her, I sent my wonderful husband to the store to get some marshmallows and crisp rice cereal.  I formed her out of crisp rice cereal treats and covered her with pink fondant.  I used gumpaste for the flower on her head because it dries much stiffer than fondant.  All in all, I was happy with the cake, and I believe my clients loved it.


Although gumpaste may seem like the same thing as fondant, it is very different.  Gumpaste dries hard, almost like glass.  It will shatter if dropped after it is completely dry.  Fondant will get stiffer, but will not harden completely.  You would never want to cover a cake with gumpaste.  It is really great for delicate flower work, straps for handbags, 3D figures, shoes.  It is perfect for something that you want to maintain a specific shape.  It requires time to dry as well.  I like to let gumpaste decorations dry over night.  If you are interested in learning how to decorate with fondant or gumpaste, don't be afraid.  Pick some up at the store and play with it like you did with playdoh as a child.  It's fun!

Friday, June 15, 2012

Baking with your kids

I feel that kids should get used to being in a kitchen and feel comfortable in the environment.  I know people that went away to college and literally did not know how to boil water!  Sounds crazy to a lot of people, but it’s true.  I get my kids involved in cooking and baking as much as I can.  I want them to be able to thrive in the kitchen some day because as we all know, eating at home is much healthier and cost efficient.  

To me, there is no greater joy than sharing my love of baking with my girls, and they are great helpers!  It is something we love to do together.  However, I have to switch gears when I bake with kids.  I was a professional pastry chef, so I am highly efficient in the kitchen and can multi-task very easily.  It was a little difficult for me to switch to “teaching” mode.  I had a lot of student helpers at my job at a local university, but they were adults.  It is a little different teaching a 3 or 4 year old.  Patience when working in the kitchen with your children is an absolute must!  As parents, we are the first teachers that our children have.  I take this job very seriously and try to remember to teach my kids little things every day.  Imparting my love of and knowledge of baking to my kids is just one of those things.  

Here are some things that I have learned from my experiences in my own kitchen with my kids:

  • Don’t choose a day that you have a gazillion cookies for a bake sale or birthday party to make to teach your children.  As a mom, it’s hard enough to get those kinds of things done on your own sometimes!  
  • I am a perfectionist when it comes to my baking.  I have learned to let that go when my kids are helping me.  It is just food after all!
  • Be patient

  • Give them tasks that they are able to do
  • Have fun
  • Expect a mess on hands, counters, etc.

Some simple steps to baking with kids:
  1. Decide what to make.  Cookies or muffins are always a good choice.  My kids LOVE to scoop both of these things!
  2. Read through the recipe completely.  This is always a good idea!  There is nothing worse than mixing a dough for a cookie and then realizing that it needs to be chilled overnight or that you don’t have one of the ingredients.  It is especially frustrating when you have a very disappointed 4 year old who wants cookies!
  3. Wash hands.  Often.
  4. Assign Tasks.  Divide the tasks if you have more than one child.  Make sure that the child that you have assigned the task to is able to complete it.
  5. Get all the ingredients together, or Mise en Place.  Mise en Place literally means putting in place.  This is a term that I heard constantly in culinary school.  It is especially important when baking with kids.  They can measure everything out.  You ensure you have all the ingredients, and it keeps little hands from roaming when it is time to actually mix the recipe.
  6. Use safe tools for small hands.
  7. Clean up and put things away as you go.  It is an important lesson to teach your children, to clean up after themselves!  If you do this, you can have your kitchen almost back to new by time the cookies are out of the oven!

I hope this has helped some of you get the courage to get your kids involved in the kitchen.  All these tips can be used when cooking with your kids too, they don’t just have to be for baking.  So, get in the kitchen and bake some cookies with your kiddos!


Tuesday, May 8, 2012

Oreo Cheesecake Cupcakes


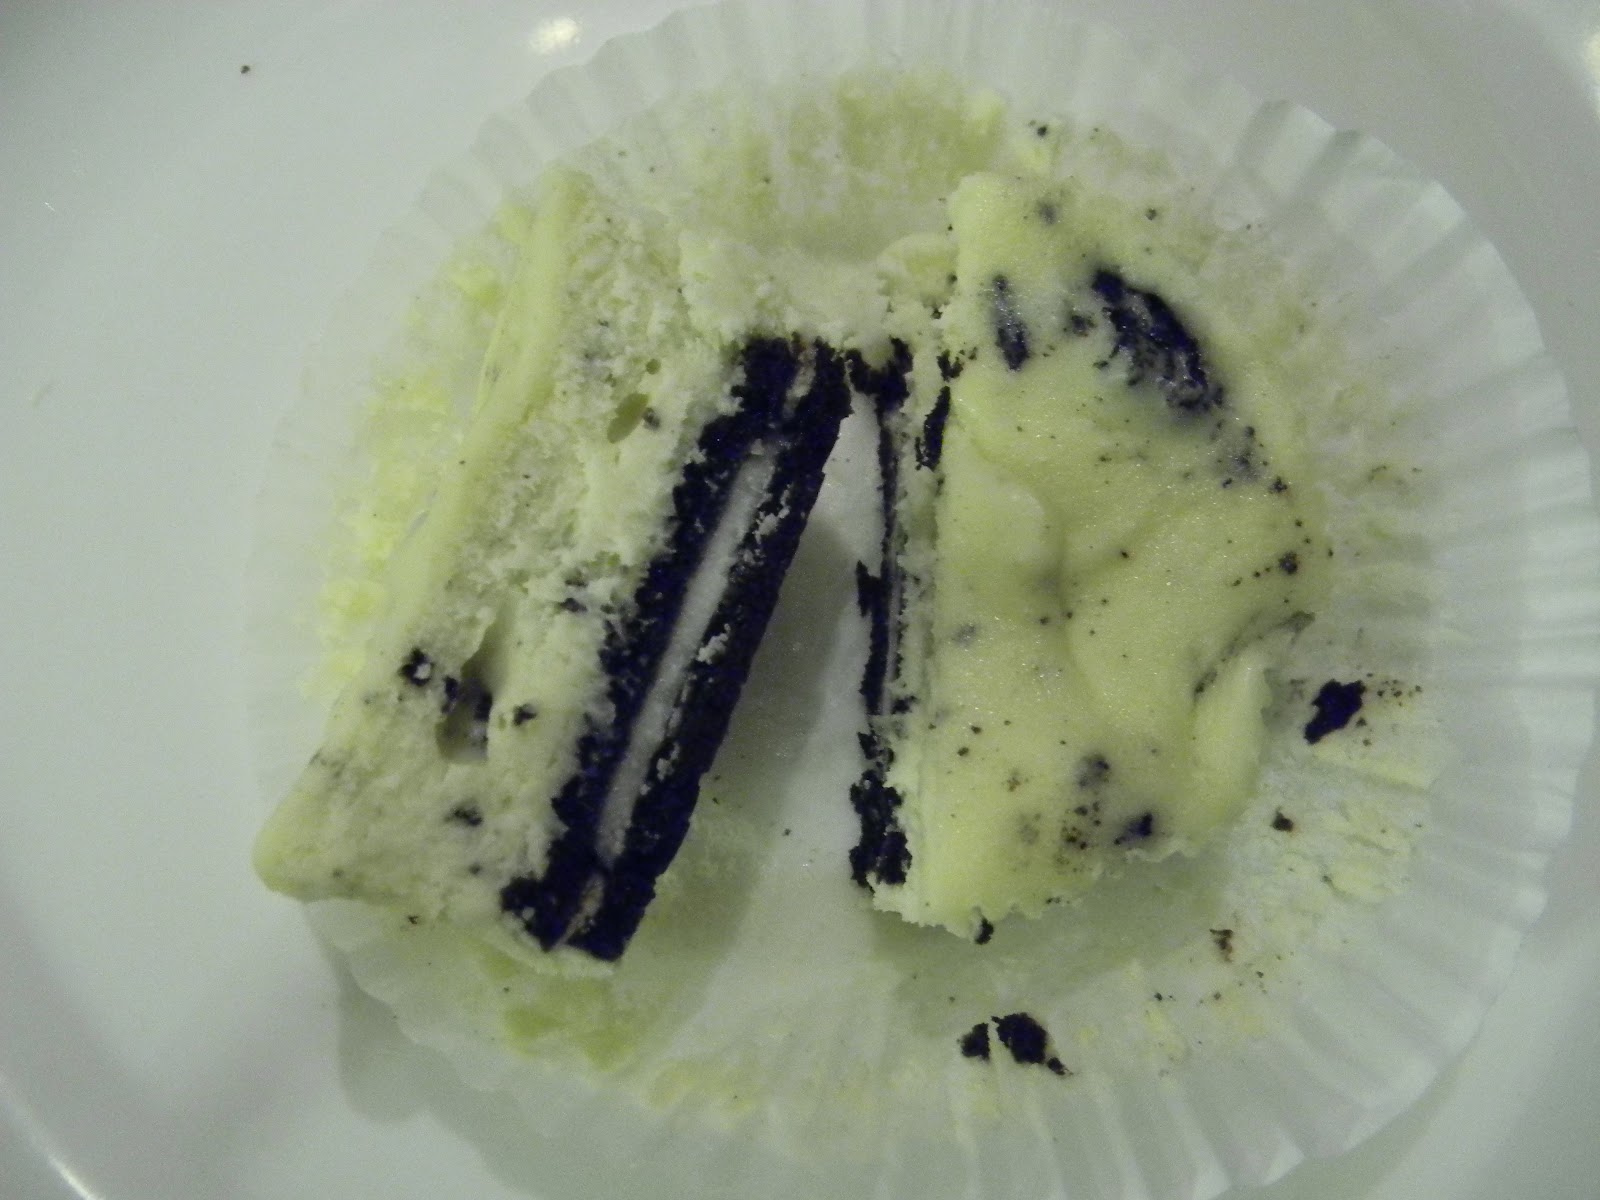
Who doesn't like cheesecake?  OK, a lot of people don't like cheesecake, but I just don't get it.  How could you not like cheesecake?  I love cheesecake, and my niece and my kids LOVE oreos, so I decided to make these individual cheesecakes for our Easter celebration.

How easy are these cupcakes?!?  Instead of having to make a crumb crust and pushing into the bottom of a springform pan, I just put one whole oreo on the bottom of each cupcake paper.  I even did these in mini cupcakes for my daughter's snack at school.  I just used mini oreos.  You could use any old recipe for cheesecake that you like and add some crushed cookies in it.  As with all cheesecakes, I baked them at a low temperature.  And, I kept them in the muffin pans in the fridge until they were completely cool.  They came out of the paper nicely and made around 3 dozen full size cupcakes.  The kids loved them!


Baking a cheesecake can be a bit tricky.  In my experience, baking at a low temperature is the best.  I tend to go anywhere between 275° to 325° depending on the particular cheesecake.  For a whole cheesecake, I always use a water bath.  To find out more about baking with a water bath, click here.  You do not want to overbake your cheesecake, but you certainly don't want to underbake it either.  Essentially, cheesecakes are baked custards which can be tricky to tell when they are done.  I always take mine out when they edges are set with tiny cracks forming around the outside edges while the center is still jiggly.  With a little practice, you will know precisely when to take it out :)

Wednesday, April 25, 2012

Caillou Cake


I was actually asked to make a cake for a kid's birthday party where I knew the character!  Caillou!!!  This little boy was turning 4 and wanted a Caillou cake.  


I made a monkey cake in January for this little boy's older brother.  We decided to do the same thing for this cake which was one layer of white almond cake, one layer of chocolate cake and french buttercream.  The birthday boy's favorite color is red, so I decorated the cake with red.  I used fondant to replicate Caillou.  I was pretty happy with the results.  


I have learned over the years of making cakes that if you want to do two different flavors of cake, you will most likely end up cutting a majority of people two pieces of cake instead of just one because everyone wants to taste both.  Then, a lot of cake is wasted because not everyone can finish both pieces of cake.  Instead of doing cakes half white and half chocolate, for instance, I prefer to do the two different flavors layered on top of one another.  That way, everyone gets a small piece of both in their one single slice.  This makes for less waste.  

Wednesday, April 18, 2012

Monster High Cake

I made this Monster High cake for a little girl who was turning 4.  Again, I had no clue what in the world Monster High was, so I had to look it up.  Like I have said, I do have 2 little girls, but I am so out of it when it comes to what's popular with kids.


Upon searching for Monster High, I found the Monster High logo and decided to replicate that on fondant as the centerpiece for the cake.  The actual logo did take me some time to complete.  I used a variety of techniques to complete it too.  I cut out the fondant to the correct shape.  I used paint brushes to paint it and used a pastry bag to pipe on it.  I let it sit for a while to stiffen up before moving it onto the cake.  After painting on the fondant, it can get a bit soft.  I used pink and black for the icing colors atop a cake that was half chocolate and half white almond.  I got to actually attend this birthday party, and the cake was a huge hit!  Someone ended up spilling almost an entire pitcher of water on the cake after it was served, though.  L:uckily, I think it was pretty well salvaged.


You have to be careful when adding certain colors to icing.  Reds and purples can really alter the flavor of icing.  You can buy what is called "no taste red,' but even that can leave you with a not quite right taste.  Even hot pinks and purples can really affect the flavor.  So, if using colors in the red/purple family, use a deft hand and keep tasting the icing to make sure it doesn't get an "off" flavor.

Thursday, March 22, 2012

Chocolate PB Grahamwiches (Recipe Included)


My mom made these for us when we were younger, and I always loved them.  I thought about them recently and realized that my kids would love them too!  They are super easy and quite tasty!


So, anyone that knows me knows that when I want chocolate pudding, I make it from scratch.  It is not like me to buy a box of pudding mix.  However, I will use a pudding mix as a component in another recipe on occasion.  This is one of those occasions.  I love these tasty little frozen treats and so do my kids.  They are super easy to make too!  If you read my blog regularly, you know that I like to use natural peanut butter when I bake.  You end up with less sugar in the final product, and it tastes more peanut buttery to me.  This is no exception.  The pudding mix is so sweet, there is no need to add more sugar in the peanut butter.  I purchased the graham crackers to make these, but in the future, I plan to make my own graham crackers.  I will be sure to post about that when I do :)

Graham crackers came about in 1829 and were developed by a Presbyterian minister, Sylvester Graham.  They are made with graham flour which is a combination of finely ground white flour and coarse-ground wheat bran and germ.

Chocolate PB Grahamwiches
1 1/2 c milk
1/2 c peanut butter
1 small pkg instant chocolate pudding
1 box graham crackers

Mix the milk, peanut butter, and pudding mix until well blended.  Spread between two graham crackers.  Wrap individually with plastic wrap and freeze.

Monday, March 12, 2012

Swimming Pool Cake


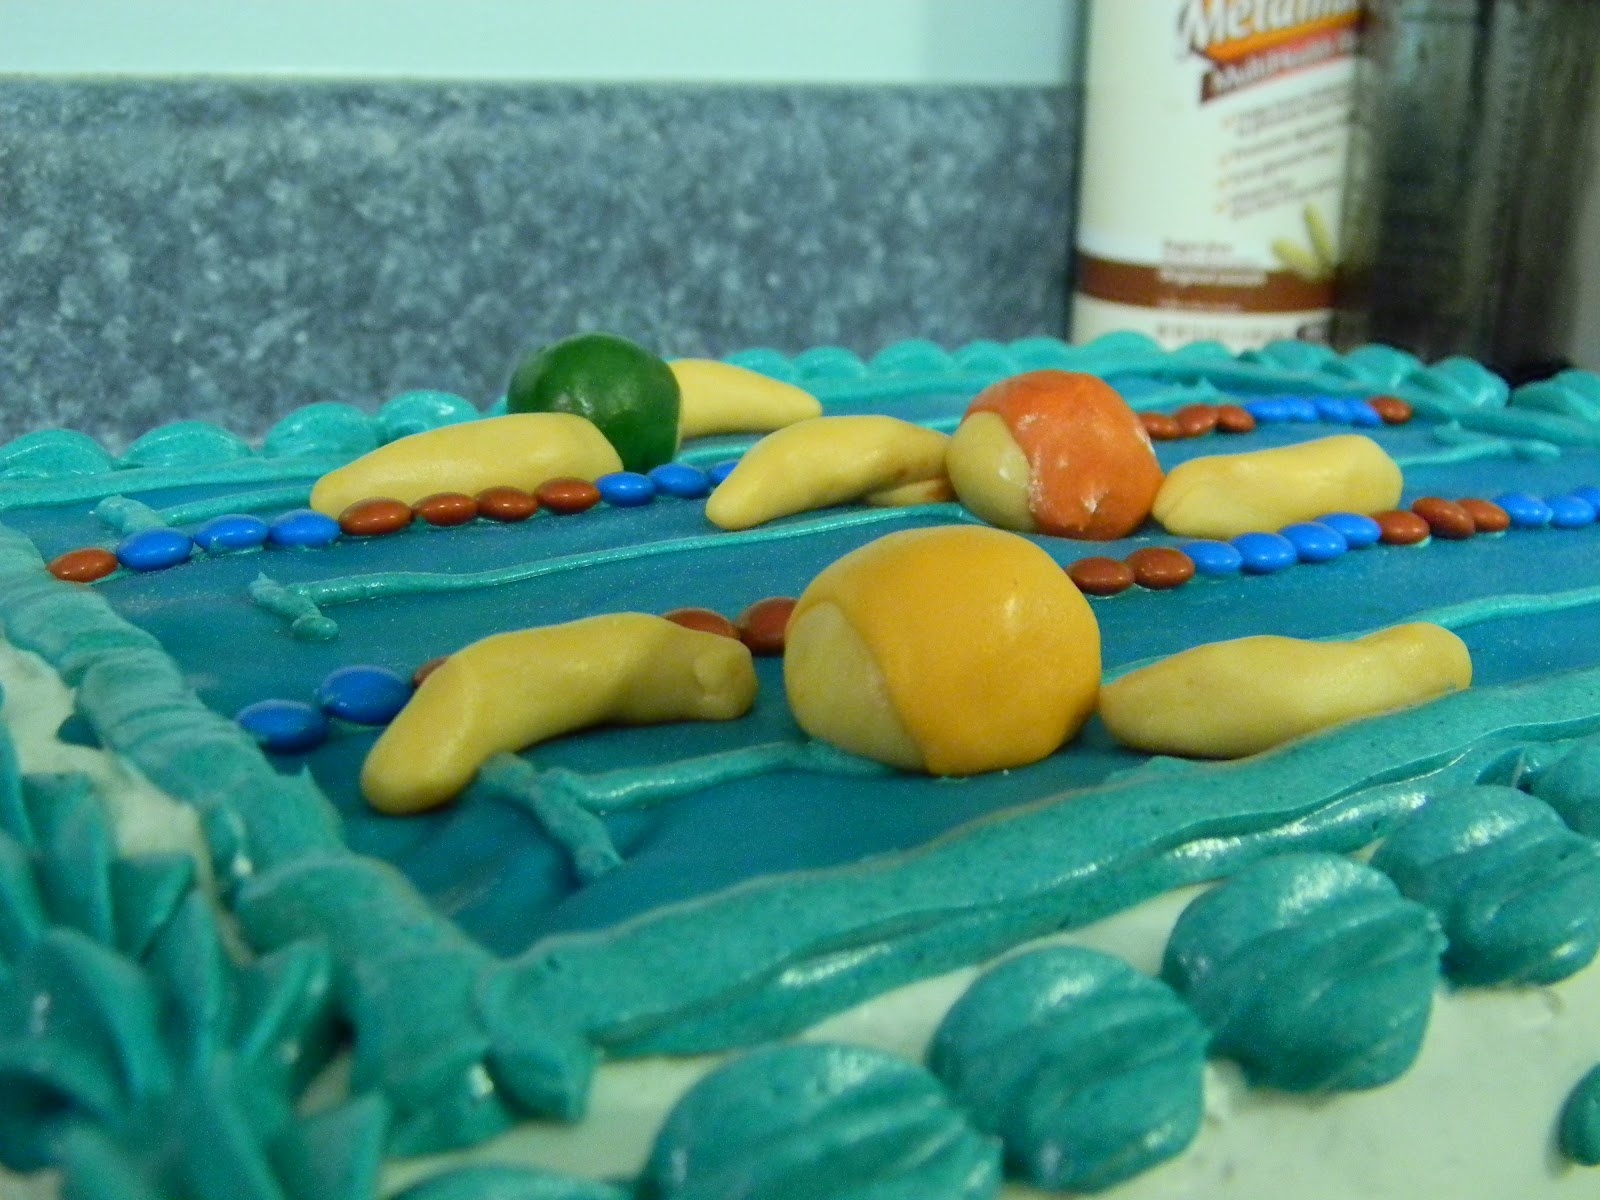
I actually made this cake a while ago for a girl who was turning 12, I believe.  She loves to swim and even helps out at the local aqua club with teaching the younger students.  So, she chose to have a swimming pool cake for her party :)


We did a small 1/4 sheet cake which feeds about 16-20 people for the birthday girl's bowling party.  Her mom and her brought me a picture of a cake similar to the one that I did for me to duplicate.  Using fondant, I molded some people with swimming caps mid-stroke.  I used mini m&ms to divide the lanes in the pool.  I think it was super cute!


Just as an FYI, I never freeze any of my products.  Everything that I bake is fresh made to order.  I feel that freezing a baked good, thawing it, then selling it compromises the quality of the item itself.  So you can rest assured that anything that you order from me, be it cake, cookies, or pie, was made fresh for you the day before or the day of your order.